360 Virtual Tours – Camera Setup
In this earlier postings we looked at what a virtual tour is, then the equipment we use to capture the images for the tours. In 360 Virtual Tours – Camera Setup we will take a look at how we photograph property virtual tours.
Having set up the pano head, as mentioned in the second part of this tutorial, the camera is placed on the pano head, and fixed to the tripod.
The camera height is set at approximately 5 ft to give a normal view of the room, and the tripod placed in a suitable position in the room. Normally this is as close to the centre of the room, but sometimes this is not practical as in the case of bedrooms where often the bed is in the way, so the camera has to be positioned to give the best overall view.
The camera is set to Manual. It is imperative that the camera is set to manual, and the same settings are used when shooting all of the images for the room.
The lens, which has an autofocus facility, is also set to manual as we do not want anything to change between the shots for the room.
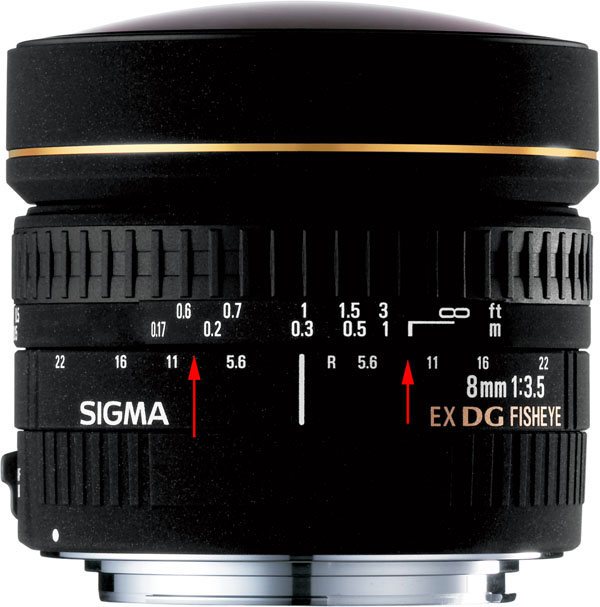
With the camera set to manual, the aperture is set to f10, which is mid range giving the best balance between shutter speed and focal depth.
The focus ring is set to the hyperfocal length for the f10 aperture. This give a range of “in focus” from around 0.65ft to infinity.
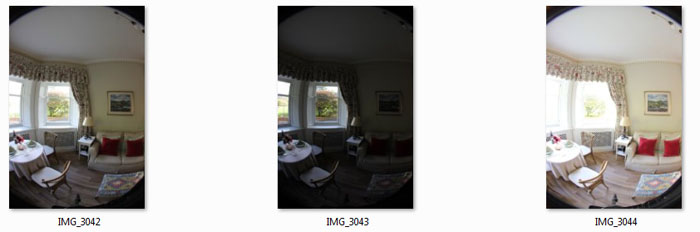
The camera is now set for automatic exposure compensation, which means the camera will take 3 shots at the same position. The first is -2 stops from the midpoint exposure, the second shot is at 0 (ie the correct exposure) and the third shot at +2 stops. The process of exposure bracketing is to brighten the darkest areas by 2 stops, and to reduce the exposure of the brightest areas by 2 stops, reducing the risk of burnout at windows.
Point the camera to a position in the room that have the average light. For example in a normal room the window will be the brightest position, 180 degrees away from the window will give the darkest position, so the camera is pointed to a mid point and the shutter speed set so that the exposure mid way on the camera exposure meter. With Exposure bracketing set, the camera will now take 3 shots as seen in the image below:
The camera is now rotated through 90 degrees and the next set of images taken. There are no changes made to the shutter speed… all the images for this panorama MUST be taken at the same settings.
Once the 4 sets are done, making up the full 360 degrees, we then point the camera vertically up and shoot the 3 images, and finally, using the nadir adapter, point the camera vertically down, and move the tripod so the camera can “see” where the tripod was standing, and photograph the set of 3 exposures for this direction. So that’s it… one room shot leading to 18 images in total.
The same process is now done for each room in turn, the only thing different being that in each room, a fresh meter reading is taken and used for that location. So long as the 6 sets of images that make up each room are taken at the same initial exposure setting, then everything will be ok.
Next, and this is not photography, but part of what we do at 360virtual-tours.net is to prepare the floor plan which will be added to the virtual tour when the tour is compiled. To produce the floor plan we use a devilishly cleaver iPad (or iPhone/Android) App called Magic Plan. Click on the image to find more about this App. 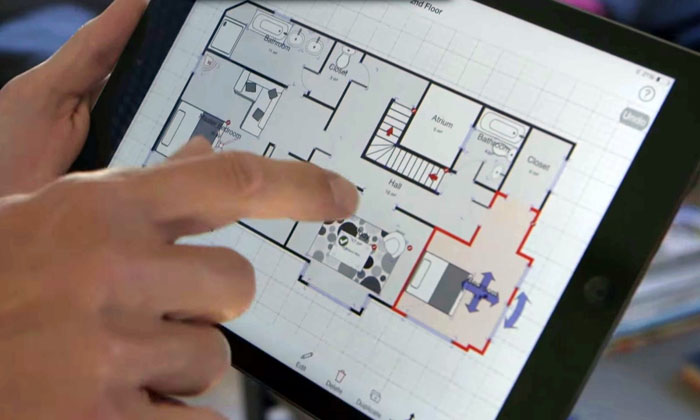
Finally, using another camera, fitted with a wide angle lens, take any still images internally and externally, that we may use later, to compliment the complete virtual tour.
So, thats the photography side…. a typical house might require 200 images for the panoramas and perhaps 10-20 still images some of which may be used in the tour.
Thats it… so long as the basic rules are followed, you will have a set of images which are now ready for processing.
To shoot an average house takes around 1 hour to shoot and prepare the floor plan. If only the processing was that quick – More of that in the next part of the tutorial.