Maintaining a clean and organized home is essential not only for aesthetic purposes but also for promoting a healthy and stress-free environment. A comprehensive house cleaning checklist can simplify the process, ensuring every corner of your home gets the attention it deserves. Below is a guide to help you achieve a spotless home efficiently.
Why Use a House Cleaning Checklist?
A house cleaning checklist serves several purposes:
– Organization: Helps you tackle tasks methodically, avoiding missed areas.
– Time Management: Breaks down tasks into manageable portions, saving time.
– Efficiency: Ensures all areas are cleaned without duplicating efforts.
General Supplies You Need
Before diving into cleaning, gather the right tools and supplies to make your tasks easier:
– Cleaning Tools: Microfiber cloths, sponges, scrub brushes, mop, vacuum cleaner.
– Cleaning Products: All-purpose cleaner, glass cleaner, disinfectant spray, floor cleaner.
– Extras: Trash bags, gloves, duster with an extendable handle.
Weekly vs. Monthly Tasks
Creating a schedule that divides weekly and monthly cleaning tasks can help maintain cleanliness without feeling overwhelmed.
| Task Frequency | Areas/Tasks to Focus On | Examples |
| Weekly | High-touch surfaces and common living spaces | Dusting furniture; vacuuming floors; wiping countertops |
| Monthly | Deep cleaning less frequently used areas | Washing windows; cleaning oven; scrubbing baseboards |
Daily Habits for Maintaining Cleanliness
- Make your bed each morning to instantly tidy the bedroom.
- Wipe down kitchen counters and stovetops after cooking.
- Declutter surfaces in shared spaces like coffee tables or countertops.
- Place dirty laundry in hampers rather than leaving it scattered.
Room-by-Room Breakdown
- Wash dishes or load/unload the dishwasher daily.
- Wipe down appliances such as the fridge and microwave.
- Clean sinks with baking soda or disinfectant spray.
- Scrub toilet bowls and wipe seat/lid areas.
- Spray shower walls with mildew-preventive cleaners after each use.
- Polish mirrors and faucets for added shine.
- Dust shelves, furniture surfaces, and electronics.
- Vacuum rugs/carpets or sweep hard floors regularly.
- Fluff pillows/cushions to keep them looking fresh.
- Change sheets weekly or more frequently if needed.
- Organize nightstands by removing unnecessary clutter.
- Vacuum under beds if accessible.
- Sweep/mop flooring near entrances to remove tracked dirt.
- Wipe down door handles/light switches often touched by hands.
Pro Tips for Efficiency
- Start from top to bottom (e.g., dust high shelves before vacuuming floors).
- Use multitasking tools like 2-in-1 mops that both clean and dry surfaces simultaneously.
- Assign family members individual tasks to divide responsibilities evenly.
By following this structured approach using checklists tailored to your needs, maintaining a spotless home becomes manageable over time while fostering an inviting living environment for everyone inside it.
Pro Tips for a Spotless Kitchen from a Maid Service Washington DC
A clean and organized kitchen not only enhances the aesthetic appeal of your home but also ensures a hygienic space for meal preparation. Tidying up your kitchen like a pro requires a structured approach that covers every inch, from countertops to cabinets. Follow these essential steps to transform your kitchen into a spotless and functional area.
Declutter First with a Cleaning Company Washington DC
Start by removing all unnecessary items from the countertops, drawers, and pantry. Ask yourself:
– Do I use this item regularly?
– Is this item expired or broken?
– Can this item be stored elsewhere or donated?
Once decluttered, sort items into three categories: keep, donate, or discard.
Effortless Cabinet and Drawer Organization with Maids Washington DC
- Group Similar Items Together: Arrange cookware, utensils, and small appliances according to their purpose (e.g., baking tools in one section).
- Use Storage Solutions: Invest in drawer dividers, lazy Susans, or stackable shelf organizers to maximize cabinet space.
- Label Containers: Transfer pantry items like flour, sugar, and pasta into airtight containers with labels for easy identification.
| Item Type | Organization Solution | Benefits |
| Utensils | Drawer dividers | Prevent clutter |
| Spices | Tiered racks | Quick access |
| Dry Ingredients | Airtight labeled containers | Prolongs freshness |
Thorough House Cleaning Tips for Washington DC Homes
- Counters & Backsplashes: Wipe down counters using an all-purpose cleaner suitable for your surface type (granite vs laminate). Focus on corners where grime often accumulates.
- Cabinet Exteriors: Remove grease buildup by wiping cabinet doors with warm soapy water or specialized wood cleaners. Avoid abrasive materials that might damage finishes.
- Appliances: Clean the exterior of appliances such as refrigerators, microwaves, stoves, and dishwashers using appropriate cleaners for stainless steel or other finishes.
Deep Clean Appliances
Refrigerator
1. Empty all contents; discard expired items. 2. Wipe interior shelves with mild soapy water. 3. Vacuum condenser coils at the back to improve performance.
Oven
1. Use baking soda paste for natural grease removal on racks and walls. 2. Run the self-cleaning cycle if available.
Dishwasher
1. Remove filters to rinse away trapped particles. 2. Run an empty cycle with white vinegar to eliminate odors.
Address Floors Last
Finally, sweep up debris before mopping tiles or hardwood floors with an appropriate cleaner specific to your flooring type.
Steps for floor cleaning: 1. Sweep thoroughly under cabinets and around appliances. 2. Spot-clean stubborn stains with a damp cloth. 3. Mop starting from one corner towards the exit door for even coverage.
By following these essential steps consistently over time while incorporating routine maintenance practices,you can ensure lasting tidiness proportional effort-output harmony
Essential Steps to Tidying Up the Kitchen Like a Pro
A clean and organized kitchen is not only aesthetically pleasing but also promotes a healthier, more efficient cooking environment. Tackling the kitchen may feel overwhelming, but with the right steps and strategies, you can tidy it up like a professional. Follow this structured guide to maintain a spotless and functional kitchen.
Start with Decluttering
Before you begin cleaning surfaces or appliances, remove unnecessary items to create space for effective cleaning: – Empty countertops: Remove small appliances and clutter to expose all surfaces. – Check cabinets: Discard expired food, consolidate duplicates (e.g., half-empty spice containers), and reorganize for better access. – Declutter the fridge: Toss outdated leftovers, expired condiments, or spoiled produce.
Clean from Top to Bottom
Cleaning in the right sequence ensures no area gets overlooked or re-soiled: 1. Ceilings and lights: Dust ceiling corners, light fixtures, and fans. 2. Cabinets and shelves: Use a gentle cleaner for cabinet exteriors, paying attention to grease buildup near cooking areas. 3. Counters and backsplashes: Wipe these surfaces with an appropriate cleaner that suits your material (granite-safe cleaner for stone tops).
Pay Attention to Appliances
Appliances are often hotspots for grime accumulation. Clean them thoroughly using these steps: – Refrigerator: – Empty contents onto a table or countertop. – Remove shelves/drawers for separate washing in warm soapy water. – Wipe interior walls with an odor-neutralizing solution like baking soda mixed with water. – Oven/Stovetop: – For ovens without self-cleaning features, use an oven-safe degreaser spray. Allow it to sit before scrubbing residue. – Stovetop burners should be cleaned based on type—gas burners often require soaking removable parts while glass stovetops need specialized cleaners. – Microwave: – Steam-clean by heating a bowl of water mixed with lemon juice inside the microwave for 5 minutes before wiping away soft residue.
| Appliance | Cleaning Frequency | Recommended Cleaning Method |
| Refrigerator | Weekly wipe-down; deep clean monthly | Baking soda + water solution |
| Oven | Every two weeks | Degreasing solutions |
| Dishwasher | Monthly | Run empty cycle with vinegar or dishwasher cleaner |
| Microwave | Weekly | Lemon steam method |
Focus on Sink and Faucets
The sink is one of the most used areas of the kitchen: – Scrub down the basin using baking soda followed by white vinegar for deep cleaning. – Polish faucets with a mild detergent or chrome-safe polish to restore their shine.
Floors Deserve Attention Too
Finish off your kitchen cleaning by focusing on the floor: 1. Sweep thoroughly under cabinets and appliances where crumbs tend to gather. 2. Mop using an appropriate solution depending on your flooring type—tile floors may require stronger cleaners compared to wood or laminate.
Establish Daily Maintenance Habits
To keep your kitchen tidy between deep cleans: – Wipe down counters daily after use. – Wash dishes immediately instead of letting them pile up in sinks or dish racks. – Take out trash regularly—especially if you dispose of food waste—to prevent odors.
By following these structured steps regularly, you’ll maintain a professional-level tidiness in your kitchen without needing excessive effort every time.

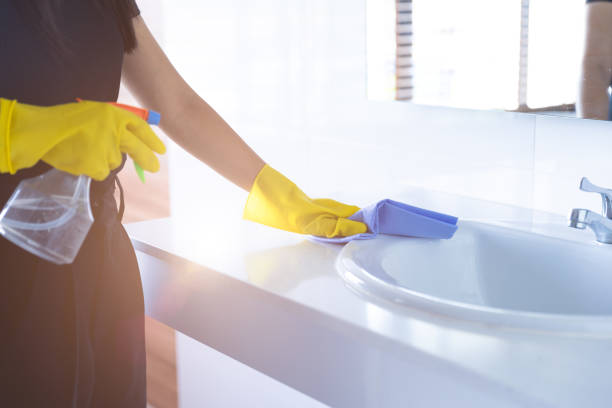
Effortless Tips for a Sparkling Bathroom with a Cleaning Service Washington DC
Maintaining a clean and sparkling bathroom is essential for both hygiene and aesthetics. Bathrooms are often one of the most used spaces in a home, and as such, they require regular attention. Follow this step-by-step guide to keep your bathroom looking spotless without spending hours cleaning.
1. Gather Your Cleaning Supplies
Before starting, ensure you have all the tools and products you’ll need: – Microfiber cloths or sponges – Toilet brush – Scrubbing brush for grout – All-purpose cleaner or bathroom-specific cleaner – Glass cleaner – Disinfectant wipes or spray – Baking soda and white vinegar (for natural cleaning options) – Mop or steam cleaner (optional)
Having everything within reach will make the process much smoother.
2. Declutter Surfaces
Remove all items from countertops, shelves, and other surfaces. This includes toothbrush holders, soap dispensers, and toiletries. Organize them into categories or store them away temporarily to make cleaning easier.
3. Clean Bathroom Fixtures
Focus on fixtures like faucets, sinks, bathtubs, and showers: – Spray an all-purpose cleaner onto the sink basin, faucet, and countertop. – Let it sit for a few minutes before scrubbing with a sponge or cloth. – Use baking soda mixed with water to remove tough stains on porcelain sinks.
For showers: – Apply a shower cleaner to tiles and glass doors. – Use a scrubbing brush on grout lines to eliminate mold or mildew buildup.
Pro Tip: A mixture of equal parts white vinegar and water works wonders on stubborn soap scum.
4. Polish Mirrors and Glass
To give your bathroom that extra sparkle: 1. Spray glass cleaner directly onto mirrors or shower doors. 2. Wipe with a dry microfiber cloth in circular motions for streak-free results.
Alternatively, if you prefer a chemical-free solution: – Mix three parts water with one part vinegar in a spray bottle. – Apply it to glass surfaces before wiping clean.
5. Disinfect High-Touch Areas
Focus on areas like: – Light switches – Door handles – Toilet flush levers
Use disinfectant wipes or sprays designed for eliminating bacteria effectively.
Cleaning Checklist for Quick Reference
| Task | Frequency | Supplies Needed |
| Scrub sink | Weekly | All-purpose cleaner & sponge |
| Clean shower/tub | Weekly | Shower cleaner & scrub brush |
| Wipe mirrors & glass | Weekly | Glass cleaner & microfiber |
| Mop floors | Weekly/As needed | Floor mop/steam mop |
| Sanitize toilet bowl | Twice weekly | Toilet bowl cleaner & brush |
| Dust light fixtures | Monthly | Duster |
This table can serve as an easy reminder of how often tasks need attention within the bathroom space.
6. Deep Clean the Toilet
The toilet is one of the most crucial areas to maintain properly: 1. Pour toilet bowl cleaner inside the rim. 2. Let it sit for at least five minutes before using the toilet brush to scrub thoroughly. 3. Don’t forget the exterior – wipe down the seat, lid, base, and handle with disinfectant wipes.
For stubborn stains: Sprinkle baking soda inside the bowl before scrubbing with your brush.
Tips for Maintaining a Sparkling Bathroom
Keep your bathroom fresh between deep cleans by adopting these simple habits:
1. Wipe down surfaces daily: Use disinfectant wipes after every use of counters or sinks. 2. Ventilate regularly: Open windows or run an exhaust fan after showers to reduce moisture buildup. 3. Use storage solutions: Baskets or wall-mounted shelves keep clutter off countertops while ensuring essentials are accessible. 4. Replace towels frequently: Damp towels can harbor bacteria; switch them out every few days.
Implementing these tips will help ensure your bathroom stays fresh longer without requiring constant deep cleans!
Expert Tips for Refreshing the Bedroom and Creating a Relaxing Space
A clean and well-organized bedroom plays a crucial role in ensuring a restful and rejuvenating environment. By following expert tips, you can effortlessly refresh your bedroom and create a calming retreat. Below are practical steps to help you achieve this transformation.
Declutter Your Bedroom for a More Relaxed Atmosphere
- Eliminate unnecessary items: Remove anything that does not belong in the bedroom, such as old magazines, unused furniture, or excessive decor.
- Organize essentials: Use storage solutions like baskets, bins, or drawer organizers to keep items tidy. For example:
| Item Type | Suggested Storage Solution |
| Books | Wall-mounted shelves or baskets |
| Seasonal clothes | Under-the-bed storage bins |
| Jewelry | Compartmentalized trays |
- Adopt the “one in, one out” rule: Every time you bring in something new, remove an older item to avoid clutter buildup.
Optimize the Bed for Comfort and Cleanliness
- Wash all bedding regularly: Launder sheets, pillowcases, and duvet covers every 1–2 weeks to maintain hygiene. Use hypoallergenic detergents if needed.
- Invest in quality linens: Opt for breathable fabrics like cotton or bamboo for added comfort. A thread count between 300–500 strikes the perfect balance between luxury and durability.
- Rotate the mattress: Flip or rotate your mattress every three to six months to ensure even wear and extend its life.
Create a Dust-Free Environment
- Dust all surfaces using microfiber cloths that trap particles effectively. Focus on nightstands, dressers, lampshades, and baseboards.
- Vacuum carpets or area rugs at least once a week using a vacuum with HEPA filters.
- Clean ceiling fans with an extendable duster to prevent dust circulation when they’re in use.
- Use air purifiers to reduce allergens like dust mites or pet dander.
Maximize Natural Light While Maintaining Privacy
- Open curtains during the day to let natural light flow into your room.
- Choose sheer curtains or blinds that allow sunlight but offer privacy at night.
- Regularly clean windows inside and out for streak-free brightness.
Add Personal Touches for Relaxation
- Arrange soothing artwork or photographs on walls.
- Place indoor plants like lavender or peace lilies that improve air quality while adding greenery.
- Use scented candles with relaxing aromas such as chamomile or vanilla.
By following these expert tips, you can transform your bedroom into a refreshing sanctuary tailored for rest and relaxation while ensuring it remains functional and clutter-free year-round.
Living Room Cleaning Made Easy with Practical and Time-Saving Tips
The living room often acts as the heart of any home — a place for gathering, relaxing, and entertaining. Keeping it clean can seem like a daunting task, especially if you have a busy lifestyle. However, with practical and time-saving tips, maintaining a spotless and welcoming living room doesn’t have to be overwhelming. Below is a step-by-step guide to help you stay on top of living room cleaning in an efficient manner.
Start with Decluttering
Clearing the clutter is the first step in any effective cleaning routine. It helps create a blank canvas for dusting and vacuuming.
- Gather misplaced items: Use a basket or bin to collect items that don’t belong in your living room (e.g., toys, books, or dishes) and return them to their proper places.
- Organize surfaces: Arrange magazines, remote controls, or decorative items neatly on coffee tables or shelves. Consider using storage boxes or trays to keep things tidy.
- Discard unnecessary items: Dispose of trash like old receipts or packaging and set aside items for donation if no longer needed.
Dust Surfaces Efficiently
- Start from the top down — begin with ceiling corners, light fixtures, and fans before moving to lower surfaces such as shelves and tables.
- Use microfiber cloths as they are highly effective at trapping dust particles without scattering them into the air.
- Pay special attention to hard-to-reach areas such as behind electronics or between couch cushions.
Focus on Upholstery Maintenance
- Vacuum regularly: Utilize vacuum attachments to clean crevices where crumbs often accumulate.
- Spot-clean stains: Treat spills promptly using an appropriate cleaner that matches your upholstery material (e.g., fabric-safe cleaners for textiles). Test any product on an inconspicuous area first.
- Refresh cushions: Fluff pillows regularly to maintain their shape and consider washing removable cushion covers according to care labels.
Clean Floors Thoroughly
| Flooring Type | Cleaning Steps | Recommended Frequency |
| Carpets/Rugs | Vacuum thoroughly; spot-clean stains | Weekly |
| Hardwood Floors | Sweep debris; mop with wood-safe cleaner | Weekly |
| Tiles | Sweep/vacuum; mop with mild cleanser | Weekly |
Remember to move lightweight furniture periodically so you can clean underneath for thorough results.
Tidy Up Electronics
- Wipe screens gently using a screen-safe microfiber cloth.
- Dust around consoles or speakers using compressed air where necessary.
- Organize cables by bundling them neatly using ties or clips.
Add Finishing Touches
- Lightly spritz fabric refreshers on upholstery.
- Arrange throw blankets neatly over chairs or sofas.
- Position scented candles or diffusers strategically for an added sense of comfort.
By following these practical steps consistently every week (or bi-weekly), you’ll reduce buildup of dirt while saving time on deep-cleaning sessions later down the line. This structured approach ensures your living room stays ready for family gatherings or spontaneous visits from guests all year round!
- The Ultimate Guide to Cleaning Service Washington DC and What’s Included in Professional Maid Services
- Exceptional Cleaning Service Washington DC Residents Can Trust
- The Complete Guide to Hiring the Best Cleaners Washington DC for a Spotless Home
- Finding the Best Cleaning Service Washington DC Tailored to Your Needs
- The Ultimate Guide to Maid Service Washington DC for a Spotless Home
- A Complete Guide to Maid Service Washington DC for Deep Cleaning Every Room in Your Home
- Comprehensive Cleaning Checklist and Tips for Maid Service Washington DC
- The Ultimate Guide to Choosing a Cleaning Service Washington DC Residents Trust