Deep cleaning every room in your home can feel overwhelming, but with the right plan and approach, it becomes manageable and rewarding. A thorough deep clean not only refreshes your living space but also promotes better health by removing dust, allergens, and bacteria. Here’s a step-by-step guide to deep cleaning each area of your home effectively.
Benefits of Deep Cleaning Your Home
- Improves indoor air qualityby reducing dust and allergens.
- Creates a more organized and clutter-free living space.
- Enhances the longevity of furniture, fixtures, and household items.
- Promotes mental clarity and reduces stress caused by clutter or dirt.
Essential Supplies for Deep Cleaning
- All-purpose cleaner
- Microfiber cloths or rags
- Disposable gloves
- Vacuum with attachments
- Mop or steam cleaner for floors
- Scrub brushes (small and medium)
- Baking soda and vinegar for natural cleaning solutions
- Duster with an extendable handle for hard-to-reach spots
General Steps for Deep Cleaning Every Room
- Declutter First: Remove unnecessary items from surfaces like counters, tables, or shelves to make it easier to access areas that need cleaning. Sort items into “keep,” “donate,” or “discard” categories.
- Wipe Down Surfaces: Use appropriate cleaners on furniture tops, counters, mirrors, windowsills, and other high-touch surfaces.
- Tackle Floors Last: Sweep or vacuum hard floors first before mopping with a suitable cleanser or steam cleaner.
Room-by-Room Focus Areas
| Room | Key Areas to Focus On | Suggested Frequency |
| Kitchen | Cabinets, appliances (inside & out), backsplash | Monthly |
| Bathroom | Grout lines, showerhead descaling | Monthly |
| Bedroom | Mattress vacuuming/cleaning & under-bed storage | Every 2 months |
| Living Room | Upholstery cleaning & electronics dusting | Monthly |
| Garage/Attic | Decluttering storage bins | Biannually |
Tips for Maintaining a Clean Home After a Deep Clean
- Create a weekly maintenance schedule to avoid buildup of dirt and grime.
- Address spills or messes as soon as they happen to prevent long-term stains.
- Rotate through smaller monthly tasks like washing curtains or cleaning vents so they don’t all pile up at once.
When approached methodically with preparation in mind—room-by-room—deep cleaning is not only effective but also rewarding when you see how refreshed your home becomes.
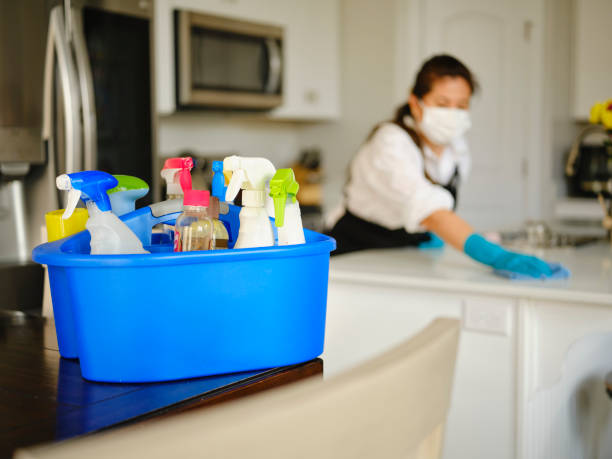
How to Choose the Best Cleaning Service Washington DC for Your Kitchen
A clean kitchen not only improves the aesthetic of your home but also promotes better hygiene.
Before starting, ensure you have all necessary supplies on hand:
– Cleaning products: Degreasers, dish soap, surface sprays, and disinfectants.
– Tools: Microfiber cloths, sponges, scrubbing brushes, mop, vacuum cleaner (or broom), gloves.
– Organizers: Bins or containers for sorting items during decluttering.
Start by removing everything from the cabinets and drawers.
– Discard expired food itemsor those that have been unused for years.
– Donate gently used kitchenwareyou no longer need (e. g. , spare utensils or gadgets).
– Group similar items together (e. g. , baking tools in one section).
After decluttering:
– Wipe down cabinet shelves with a damp cloth and mild detergent.
– Use shelf liners to protect surfaces from spills or stains.
Large kitchen appliances accumulate grease, dust, and grime over time.
| Appliance | Cleaning Instructions | Frequency |
| Refrigerator | Remove contents; wipe shelves with soapy water; discard spoiled food. | Once every 1–2 months |
| Oven | Use an oven cleaner or baking soda paste to remove baked-on stains inside the oven. | Every 3–6 months |
| Microwave | Heat a bowl of water with lemon slices; then wipe down interior surfaces. | Weekly |
| Dishwasher | Run it empty on a cleaning cycle using vinegar or dishwasher cleaner. | Monthly |
Small appliances such as coffee makers and blenders should also be cleaned regularly by disassembling removable parts where dirt can accumulate.
Countertops are high-touch areas that require thorough cleaning:
– Remove all items from countertops before wiping them down with an appropriate cleaner based on the material (e. g. , granite-safe spray for stone surfaces).
– Pay special attention to corners where crumbs often collect.
For backsplashes, use warm soapy water to remove grease splatters.
The sink is one of the most frequently used areas in any kitchen—and often one of the dirtiest:
1. Start by rinsing debris out of the sink basin. 2. Apply baking soda or a non-abrasive cleanser to scrub away stains. 3. Use vinegar to remove hard water deposits around faucets. 4. Clean garbage disposals by grinding lemon peels with ice cubes.
Kitchen floors see heavy traffic daily—spills here can lead to sticky residues over time: 1. Sweep up loose crumbs or vacuum if needed. 2. Mop thoroughly using warm water mixed with floor-specific cleaning products suitable for tile/laminate.
For grout lines between tiles that have darkened due to dirt buildup: Use an old toothbrush dipped into baking soda paste—or consider professional steam-cleaning treatments occasionally if necessary.
By following these steps systematically while incorporating regular maintenance habits like wiping spills immediately after cooking makes long-term upkeep simpler overall .
Step-by-Step Guide to Finding the Best Cleaners Washington DC for Deep Cleaning Your Bathroom
Deep cleaning your bathroom is essential for maintaining a hygienic and refreshing space. Bathrooms are high-traffic areas that accumulate bacteria, soap scum, and grime over time. By adopting a methodical approach, you can thoroughly clean every corner of your bathroom to professional standards. Below is a detailed step-by-step guide.
Step 1: Gather Cleaning Supplies
- Microfiber cloths or cleaning rags
- Scrub brushes (small and large)
- Grout brush or an old toothbrush for tight spaces
- Squeegee for mirrors and glass surfaces
- Mop or steam cleaner for floors
- All-purpose cleaner or bathroom-specific cleaner
- Glass cleaner for mirrors and shower doors
- Vinegar or baking soda (for natural cleaning solutions)
- Bleach (optional, for stubborn mold/mildew)
Step 2: Declutter and Remove Items
Start by clearing out the bathroom to make cleaning more manageable. Remove personal items such as toiletries, shower curtains, bath mats, and trash cans. This will allow you to clean all surfaces thoroughly without obstructions.
Step 3: Tackle Dusting First
Begin by dusting light fixtures, shelves, baseboards, vents, and other surfaces where dust may settle. Use a duster with an extendable handle or microfiber cloths to trap dust effectively.
Step 4: Clean Mirrors and Glass Surfaces
Use a streak-free glass cleaner to wipe down mirrors and any other glass surfaces like shower doors. You can also use a vinegar-water solution as an eco-friendly alternative.
Pro Tip: To avoid streaks on glass surfaces: – Spray the cleaner onto the cloth instead of directly onto the surface. – Wipe in vertical motions first, followed by horizontal strokes.
Step 5: Scrub the Shower & Tub
Soap scum often accumulates in showers and tubs. Apply a bathtub/shower cleaner or sprinkle baking soda on wet surfaces before scrubbing with a brush.
Key Areas to Focus On: 1. Shower walls 2. Faucets 3. Drain covers 4.
For stubborn grime, spray white vinegar mixed with water onto the area and let it sit for at least five minutes before scrubbing.
Optional:Use a mold-removal solution if mildew is present.
Step 6: Sanitize Toilets Like a Pro
The toilet is one of the most critical spots in your bathroom to keep sanitized: 1. Pour toilet bowl cleaner into the bowl; let it sit for at least five minutes. 2. Scrub thoroughly with a toilet brush. 3. Wipe down the exterior of the toilet using disinfectant wipes or an all-purpose spray.
Don’t forget less obvious areas such as under the seat hinges!
Step 7: Clean Countertops & Sink Area
Wipe down countertops using an all-purpose spray or disinfectant wipes: – Pay attention to faucet handles where germs commonly accumulate. – For hard water stains around faucets, use vinegar-soaked paper towels wrapped around trouble spots—let them sit briefly before scrubbing away residue.
If your sink drain emits unpleasant odors: 1. Pour baking soda followed by white vinegar into the drain. 2. Flush it out with hot water after ten minutes.
Step 8: Mop Floors Thoroughly
End your deep cleaning session by mopping tile flooring with warm water mixed with floor-safe detergent: – Start from one corner of the room moving toward exits to avoid stepping on freshly cleaned areas.
Step-by-Step Guide from a Cleaning Company Washington DC to Deep Clean Your Bathroom Like a Professional
A bathroom is one of the most frequently used spaces in your home, making it prone to dirt, grime, and bacteria buildup. Deep cleaning your bathroom like a professional ensures not only a sparkling clean space but also a healthier environment. This step-by-step guide will help you tackle every corner of your bathroom efficiently and effectively.
Step 1: Gather Your Cleaning Supplies
Before starting, ensure you have all necessary supplies for deep cleaning.
- Cleaning solutions: Glass cleaner, disinfectant spray, grout cleaner, and toilet bowl cleaner
- Tools: Scrub brushes (small and large), microfiber cloths, sponges, mop, bucket
- Protective gear: Gloves and a face mask if using strong chemicals
- Extras: Old toothbrush (for hard-to-reach areas) and garbage bags
Having everything in one place prevents interruptions during the cleaning process.
Step 2: Declutter the Bathroom
- Remove all items from countertops such as toothbrush holders, soap dispensers, or decorative pieces.
- Take out any towels, bath mats, or shower curtains for washing.
- Empty trash bins and get rid of expired products from cabinets or shelves.
By clearing surfaces first, you’ll ensure no area is missed during the cleaning process.
Step 3: Clean Shower and Bathtub Areas
These areas often accumulate soap scum and mineral deposits over time.
- Spray a heavy-duty bathroom cleaner onto shower walls and bathtub surfaces. Let it sit for 5–10 minutes to loosen grime.
- Scrub with a stiff-bristled brush or sponge in circular motions to remove buildup.
- For glass doors or partitions: Use a vinegar-water solution (in equal parts) to eliminate water stains.
- Rinse thoroughly with warm water to wash away residue.
- Inspect grout lines for mold or mildew; scrub them using grout cleaner or baking soda paste with an old toothbrush.
Step 4: Disinfect Toilets
- Apply toilet bowl cleaner inside the bowl and allow it to sit while you clean other parts.
- Wipe down the tank lid, seat cover, handle, and base using disinfectant spray on microfiber cloths.
- Use a toilet brush to scrub inside the bowl thoroughly before flushing away debris.
Pro tip: Don’t forget the area behind your toilet—dust tends to collect here!
Step 5: Wash Sinks and Countertops
- Spray an all-purpose cleaner on sink surfaces as well as faucets.
- Wipe excess grime with a sponge; use an old toothbrush for faucet edges or drain crevices.
- Finish off by polishing faucets with glass cleaner for shine.
For countertops: – Wipe them down after removing any stored items such as soap dishes or cosmetics. – Avoid harsh chemicals if your countertop material requires delicate care (e. g. , marble).
Step 6: Clean Mirrors and Light Fixtures
- Spray glass cleaner directly onto mirrors but avoid oversaturating them.
- Use a lint-free microfiber cloth in vertical strokes followed by horizontal ones for optimal clarity.
For light fixtures: – Dust off any visible cobwebs first using a duster. – Gently wipe down fixtures with damp cloths soaked in mild soapy water.
Step 7: Mop Floors Last
- Sweep or vacuum first to remove hair strands, dust particles, or debris from corners.
- Mop tiles using warm water mixed with floor-specific cleaners; avoid soaking grout lines excessively as this may weaken them over time.
Expert Tips for Hiring Maids Washington DC for a Spotless Home
- Daily habits:Wipe down sinks after use and squeegee shower walls post-shower sessions.
- Ventilation:Run exhaust fans during showers/baths to reduce humidity levels (prevents mold).
- Storage solutions:Use organizers under sinks/cabinets so essentials stay accessible yet orderly.
By following these meticulous steps regularly along with maintenance practices above—your bathroom will stay pristine much longer while reflecting professional-level cleanliness standards!
Tips for Effective House Cleaning Washington DC: Deep Cleaning Bedrooms for Comfort and Sleep
Deep cleaning your bedroom is essential for creating a serene and healthy environment that promotes better relaxation and sleep. By focusing on organization, removing dust and allergens, and refreshing soft furnishings, you can transform this space into a rejuvenating retreat. Here’s a step-by-step guide to thoroughly deep clean your bedroom.
Declutter and Organize
Start by decluttering your bedroom to create a clean slate. Removing unnecessary items will make the cleaning process more efficient.
- Empty Surfaces:Clear nightstands, dressers, desks, and shelves of any clutter.
- Sort Items: Use three designated categories — Keep, Donate, and Discard. Make thoughtful decisions about each item.
- For clothing, fold neatly or hang items by category (e. g. , shirts, pants).
- Use storage bins or dividers for smaller accessories like socks or belts.
- Rotate seasonal items to keep frequently used items accessible.
Dust All Surfaces
Bedrooms often collect significant amounts of dust over time. Proper dusting helps reduce allergens.
- Start High:Dust ceiling fans, light fixtures, crown molding, and high shelves using a microfiber cloth or an extendable duster.
- Move Downward:Clean picture frames, furniture surfaces, window sills, baseboards, and vents.
- Behind furniture pieces like beds or dressers.
- Inside drawers or open shelving units.
Deep Clean the Floors
Whether your bedroom has carpeting or hard flooring, it’s important to deep clean the floors thoroughly.
- Vacuum Carpets: Start with a vacuum cleaner equipped with a HEPA filter to remove dirt and allergens from carpets or rugs.
- Shampoo Carpeting(if applicable): Use a carpet cleaner machine for stubborn stains or odors.
- Clean Hard Floors: For wooden flooring or tiles:
- Sweep first to remove loose debris.
- Mop with an appropriate cleaning solution safe for the material type.
Refresh Bedding Materials
Your bed is the centerpiece of your bedroom. Regularly cleaning these materials improves sleep quality by eliminating dust mites and bacteria.
- Wash sheets weekly in hot water (if fabric allows).
- Launder pillowcases along with sheets to prevent skin irritation from oils or allergens.
- Clean comforters/duvets every few months; check care labels for proper washing instructions.
- Vacuum mattresses using an upholstery attachment; spot-clean any stains using mild detergent mixed with water.
Consider rotating your mattress seasonally for even wear. If it’s been several years since purchasing it, inspect its condition to determine if it should be replaced.
| Bedding Material | Cleaning Frequency | Notes |
| Sheets & Pillowcases | Weekly | Wash in hot water if possible |
| Duvet/Comforter | Every 3–6 months | Follow manufacturer care instructions |
| Mattress | Vacuum Monthly; Replace ~8 yrs | Spot-clean spills immediately |
Address Windows and Curtains
- Wipe down windows with a streak-free glass cleaner for clarity.
- Machine washable? Use cold water on delicate settings if applicable.
- Non-washable? Vacuum them with an attachment tool instead.
- Don’t forget blinds — use either damp cloths or specialized blind cleaners depending on their construction material (wooden/plastic).
Add Freshness & Finishing Touches
- Place air-purifying plants like snake plants near windowsills (low maintenance options).
- Incorporate lightly scented candles/diffusers containing relaxing lavender notes into corners where clutter once stood previously removed earlier steps reducing stress/acting visually pleasing simultaneously overall mood lifted transition period ends sharper tone less disorganized focus quality design enhanced during functional visual reboot successful long-term appeal maintained decision supported data findings research trends industry-backed results suggested consistently repeatable models sustainable execution scaling outcomes recognition practical engagement consistent demand progression-driven optimization satisfaction achieved goal completion delivered systematic layers measurable values integrity embedded reassurance retained customer-centric trustworthy reliability
Essential Tips for Cleaning Hard-to-Reach Spots in Every Room of Your Home
Cleaning hard-to-reach spots can often feel like a daunting task, but with the right approach and tools, you can tackle these hidden areas effectively. Neglecting these spaces can lead to dust buildup, allergens, and even unwanted pests over time. Below are some essential tips to keep every corner of your home spotless.
Tools You’ll Need
- Extendable duster: For ceilings, fans, and high shelves.
- Vacuum cleaner with attachments: To reach under furniture or behind heavy appliances.
- Microfiber cloths: Ideal for picking up dust in tight spots.
- Step stool or ladder: For accessing higher surfaces safely.
- Compressed air or small brushes: Great for electronics or vents.
Living Room
The living room is a common gathering space but often harbors dust in overlooked areas.
- Ceiling corners and crown molding
Use an extendable duster to remove cobwebs and accumulated dust from corners and moldings at the top of walls. - Behind large furniture (sofas, entertainment centers)
Move heavy furniture occasionally to vacuum behind them; use flat vacuum attachments if moving isn’t possible. - Under rugs or carpets
Roll up rugs periodically to clean underneath thoroughly as debris tends to settle there unnoticed.
Kitchen
| Area | Cleaning Tips | Frequency |
| Behind Appliances | Pull out your fridge or stove carefully; vacuum debris; wipe surfaces with a degreasing solution. | Every 3 months |
| Inside Cabinet Corners | Use a handheld vacuum for crumbs; wipe down corners with soapy water or vinegar solution. | Monthly |
| Range Hood & Vent Filters | Remove filters for soaking; scrub grease off vents using a degreaser spray. | Monthly |
Bathroom
- Behind Toilets
Use slim cleaners like bottle brushes to reach behind toilets where dust and moisture often accumulate. - Shower Tracks & Curtain Rods
Wipe down shower door tracks with an old toothbrush dipped in vinegar solution; dry thoroughly afterward.
Bedroom
- Under Beds
Utilize vacuums with low-profile heads that can slide under beds easily or store items in sealed containers to prevent clutter buildup underneath. - Ceiling Fans & Light Fixtures
Dust fan blades regularly using an extendable duster so particles don’t circulate back into the room’s air when used.
General Tips for All Rooms
- Always work from top to bottom when cleaning — this ensures that any falling dust will be cleaned as you progress downward.
- Use a flashlight when inspecting dark areas such as under furniture or inside cabinets.
- Set a schedule for deep-cleaning hard-to-reach places based on specific room usage (e. g. , high-use kitchens may require more frequent attention than guest rooms).
By incorporating these tips into your cleaning routine, you’ll ensure that your home remains not only visually appealing but also healthier from top to bottom—literally.
Transforming Storage Spaces: How to Deep Clean a Garage or Attic
Deep cleaning storage spaces like garages and attics can be overwhelming due to the accumulated clutter, dust, and forgotten items. However, with a systematic approach, you can transform these spaces into clean and functional areas. Follow the guide below to tackle your garage or attic effectively.
Step 1: Plan and Prepare
- Set aside sufficient time:Cleaning these storage areas may take several hours or even an entire day.
- Gather supplies:You’ll need trash bags or bins, storage containers, microfiber cloths, a vacuum cleaner with attachments, gloves, and possibly a dust mask.
- Declutter first:Decide whether items will be kept, donated, recycled, or thrown away.
Step 2: Decluttering the Space
A clutter-free space is easier to clean thoroughly.
- Keep (items you use regularly).
- Donate (usable items you no longer need).
- Discard (broken or unusable items).
- Group similar items together:Organize tools, seasonal decorations, sports equipment, etc. , into designated piles for better access later.
- Remove all unnecessary items:Create more usable space by eliminating outdated or unused belongings.
Step 3: Dusting and Vacuuming
- Use an extendable duster for hard-to-reach corners and ceiling beams.
- Vacuum floors thoroughly using a vacuum with strong suction power. Pay attention to edges where dirt accumulates.
- Wipe down shelves, boxes, and surfaces with damp microfiber cloths.
Step 4: Address Mold and Mildew Concerns
- Identify damp areas or signs of water damage.
- Use a mixture of white vinegar and water to clean mold-prone surfaces.
- Consider installing dehumidifiers in humid climates for long-term prevention.
Step 5: Optimizing Storage Solutions
Tips for Garage Organization: | Category | Storage Solution | |——————|—————————————-| | Tools | Wall-mounted pegboards or tool racks | | Sports Equipment | Bins with labels | | Car Supplies | Shelving units |
Tips for Attic Organization: | Category | Storage Solution | |———————-|————————————–| | Seasonal Items | Clear plastic bins with lids | | Holiday Decorations | Dedicated labeled boxes | | Heirlooms/Photos | Acid-free storage containers |
Step 6: Maintain the Cleanliness
- Regularly inspect for any leaks or signs of pest infestations.
- Establish a schedule for periodic cleaning – aim for at least twice per year.
- Rotate stored items seasonally so nothing gets forgotten long-term.
By following these steps methodically, you’ll not only deep clean your garage or attic but also create an organized space that serves its purpose more efficiently in your home.
- The Ultimate Guide to Cleaning Service Washington DC and What’s Included in Professional Maid Services
- Exceptional Cleaning Service Washington DC Residents Can Trust
- The Complete Guide to Hiring the Best Cleaners Washington DC for a Spotless Home
- Finding the Best Cleaning Service Washington DC Tailored to Your Needs
- The Ultimate Guide to Maid Service Washington DC for a Spotless Home
- A Complete Guide to Maid Service Washington DC for Deep Cleaning Every Room in Your Home
- Comprehensive Cleaning Checklist and Tips for Maid Service Washington DC
- The Ultimate Guide to Choosing a Cleaning Service Washington DC Residents Trust